Top Tips for Wireless Access Point Bridge Installation Projects
Monday, November 28, 2022 — 0 Comments
Some WiFi networking projects need to be installed outdoors, and some may require a wireless solution—That's where outdoor WiFi access points and bridges come in. Networking projects come in all shapes and sizes, with varying levels of complexity.
When setting up WiFi Access Bridges, there are some things to know to save yourself from unneeded hassles and wasting your precious time. Here are some top installation tips.
What are Outdoor WiFi Access Points?
Outdoor WiFi access points can also be known as wireless distribution systems (WDS), PTP (point-to-point) bridges, and PTMP (point-to-multi-point) bridges and are often used in networked surveillance solutions or for entrance access control. Wireless access points create a wireless local area network (WLAN) to share a wireless signal, which is ideal for areas where a router signal can't reach. WiFi access points are not wireless range extenders- they do not need to be in the range of the router in order to share the wireless signal. They connect to a router or network switch via ethernet cords.
With this in mind, an outdoor WiFi Access Point is exactly what it sounds like - a set of access points that can be placed outside, usually used to link two or more locations together. They have an IP rating for how much dust or liquid they can withstand.
What are Wireless Access Point Bridges?
An outdoor wireless bridge is ideal for locations where wired options are unavailable or allowed. They can also be a more cost-effective option in many situations.

Installing access points and bridges There's a common misconception that outdoor access points can be placed anywhere, but that's not entirely accurate. Access point installations require concise and precise measurements, along with specific steps to ensure they work as intended. Specific physical mounting configurations are needed for reliable wireless point-to-point or point-to-multipoint connection.
Here are our top tips to minimize trouble and save you time:
Top Tips
1. Conduct a Wireless Site Survey
Site surveys are a must for any wireless project, but especially so for wireless access bridges. Conduct a site survey to ensure the project has enough wireless coverage.
2. Pre-Configure Devices and Pre-Test
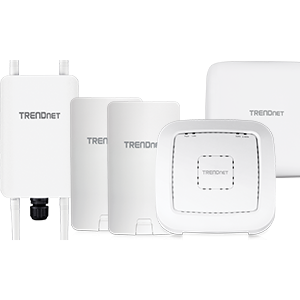
Before installing the access points at the chosen site, set them up locally to configure and pre-test the devices. In the case of the Trendnet kits pictured above, they are pre-configured out of the box. We recommend you still test devices to check for any issues - also, be sure to check the access points at least 15 feet from each other.
3. Ensure Line of Sight
The access points must be installed to have a clear line of sight - no obstruction between the devices, including buildings, trees, hills, etc. If the line of sight is blocked, the connection will be unstable.
4. Match the Elevation of Access Points
The devices should be installed at the same elevation and facing each other at least 10 feet above the ground. Both access points should be high enough for an adequate line of sight. If they are not the same height, at least make sure they are directly facing each other. They must be pointed at each other to establish a connection.
Information courtesy of TrendNet